
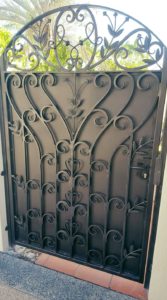
Wrought iron gates are one of the most stunning types of gate available. Their timeless style oozes elegance and they are truly suitable for any home, whether it is modern or classic! And they are practical; a good wrought iron gate will last a lifetime! But they have one big enemy: rust. Wrought iron is a ferrous metal, which means it is prone to rust.
Wrought iron gates are at particular risk of rust, because they spend so much time exposed to the elements. If your gate is starting to show its age, you probably want to know how to restore wrought iron gates. Fortunately for you, you’re in the right place! We know all there is to know about how to restore wrought iron gates. So what’s our advice? Give it a go! Restoring wrought iron doesn’t have to be hard if you follow the right steps. What are they you ask? Read on to find out!
The rust has to go! Start with a wire brush
Has your wrought iron gate lost its paint long ago? Is nature slowly reclaiming it with that sad rusty colour? Don’t worry! You can get rid of that rust with a wire brush. Wire brushes are the first and most effective tools to turn to for removing rust. They take off that flaky top layer with ease. And they come in different forms. Our favourite is the wire wheel, which attaches to your drill. The wire wheel really takes the elbow grease out of wrought iron restoration. Without it, you will have to resort to old-fashioned tactic of hard scrubbing! Wire wheels are inexpensive and they are made to fit all manner of drills, so it’s worth the investment.
To get the ball rolling, go over the entire surface of your wrought iron gate with the wire wheel or brush. You should be able to see the flaky surface rust falling away. Make sure to get into the corners and crevasses too! These parts of the gate are particularly prone to rust, as moisture is more likely to sit there. Once the surface rust is dealt with, you can move on to the next step.
Now to refine the surface – you will need some sandpaper for this
So your wire brush has done its job, but the surface still looks a bit rough and ready. What next? After the wire brush, you have to even the surface out. This is the hard part and there are no two ways about it: it’s time for some elbow grease. For this step, you will need medium-grit sandpaper. The precise type you need will depend on the condition of your gate, so feel free to exercise some discretion. And don’t short-change yourself on sandpaper either – you will probably need a fair bit!
When you’re all stocked up in the sandpaper department, it’s time to get sanding. Sand until the surface is relatively smooth and the marks left by the wire wheel or brush are mostly gone. Remember wrought iron is much harder than timber, so this will be hard work and you won’t be able to get it perfectly smooth. Near enough is generally good enough for this process. Again, make sure you sand the whole surface evenly – especially those hard to reach corners!
Think ahead: attack the rust on a chemical level, with rust converter!
Congratulations – you’ve done the hard yards! After the sanding is complete, you can breathe a sigh of relief, because the remaining stages are much easier. But that does not make them any less important – especially this step. Now, it is time for the rust converter. Rust converter, or rust neutraliser, is a chemical compound that prevents rust from spreading. The acidity of the rust converter neutralises the remaining particles of rust that you were unable to remove with the wire and sandpaper. Simply mix the rust converter with water, in accordance with the instructions on the bottle.
To apply it, you have a few options. The more thorough among us would tell you that it’s best to dip a wire brush in the solution and scrub the gate again in a circular motion. But if the sanding has gotten the better of you, another approach is to apply the rust converter with a spray bottle. Sure it’s a bit of a cheat, but it is still effective and it’s far easier!
Seal in your refreshed wrought iron with primer and paint
By now, your gate will probably be almost unrecognisable. If it is, congratulations – the process is working well! If it isn’t, don’t worry, this next step will take care of that because now, it’s time to paint! If you have painted your home before, you will know that painting is a very specific process. Follow each step and you will be sorted for years! Forget one, and the results will probably be a little underwhelming. If you need some extra clarity before you get started, feel free to ask an expert how to restore wrought iron gates. If you are confident, then read on!
First, you will need to apply an even coat of rust-inhibiting primer over your refurbished wrought iron gate. Let this dry for as long as you can – check the label on the primer to confirm how long it needs. Once dry, apply an even coat of rustproof paint. Let this dry for the required time period, and then apply another even coat. And then enjoy, because you have done it! Your wrought iron gate should be as good as new.
Prevention is better than a cure – don’t let the rust get to your wrought iron gate again!
So you’ve learned how to restore wrought iron gates. That’s a great skill to have! But, despite how exciting it is to have this newfound knowledge, you probably don’t want to use it again. The best thing to do now is take care of your wrought iron gate. Clean it regularly with a soapy water solution. If any paint scratches occur, cover them promptly with some more paint. If you see signs of rust again, get to work with the rust converter. It truly does work wonders!
For all your wrought iron needs, contact the experts at Prestige Wrought Iron today on (07) 3814 0076.